LabDeck accommodates for the creation and management of SCADA applications in MatDeck in the form of its own Easy SCADA. Easy SCADA can be used to create standard SCADA applications as well as more complex examples. The premise of Easy SCADA is to create new custom SCADA applications that can be integrated with other MatDeck features including script programming, mathematical functions, virtual instrumentation and database management.
Different ways of implementing, editing, and creating SCADA applications will be explained in depth in MatDeck SCADA User Manual.

The above image is an example of what a typical defined database which is used in SCADA applications looks like. Data from databases are integral for SCADA applications and need to be configured properly such as the one above.
As SCADA applications use hardware devices for different data processes, the hardware device itself must also be configured. This is done using configuration forms like the one below. This will be covered in further detail later on.

The types of forms shown above are a part of the necessary components needed to create SCADA applications in MatDeck. The Image below is an example of SCADA applications in MatDeck look like.

Starting SCADA applications in MatDeck
SCADA applications can only be used once the SCADA form/tags have been configured. There are multiple ways of starting SCADA applications in MatDeck. SCADA applications can be started in single MD Documents via:
- Custom canvas functions
- MatDeck script via script files
- MatDeck script via programming blocks
Each option has its own advantages depending on which you prefer.
Starting SCADA applications via Custom canvas functions
SCADA applications as mentioned earlier can be started using custom canvas functions in MatDeck. This is done in MatDeck’s normal document format. To add canvases to your document simply go to the ‘Insert’ tab located on the toolbar at the top of your MatDeck document. Once there, press on the ‘Canvas’ icon and press on the area of the document you wish to add a Canvas.

Once a new canvas has been added to the document, we can begin to write the necessary SCADA functions. The function used in this example will be scada_form().
The functions, scada_form(), has three arguments. The arguments are the parent widget, the name of the SCADA application in string form, and the name of the database used in string form, respectively.

In the example above, we use ‘0’ for the widget argument of the function. This done because the new SCADA application we are creating doesn’t have a parent widget it originates from. When a parent widget isn’t present we use ‘0’ instead. In this case, we store our SCADA form in a variable, ‘a’.
Please Note: If a project DB hasn’t been created yet, leave the argument empty (“”) as it will create a new one for you

By default, SCADA application forms that are set will open in a separate window which is used to create, edit and save your SCADA applications. Alternatively, you can choose to embed your SCADA tag form in your MatDeck document by using the embed_widget() function. embed_widget() only
has one argument which is the name of the variable or widget it is to embed.
From here, a new empty SCADA tag form will appear in your MatDeck document which you can use to create tags that will transmit the necessary data to your instruments in your SCADA panel.
Starting SCADA applications via MatDeck script files
SCADA applications can also be started through MatDeck script. This can be done of two ways, through a MatDeck script file which is dedicated to coding in MatDeck script or via a programming block in a standard MatDeck file. In this segment we will explain how to start SCAD application via a MatDeck script file.

Start a new MatDeck script file by opening the drop down menu at the ‘New’ icon present in the ‘File’ tab.
A drop down menu such as the one below will open. Select the ‘New Script’ option by pressing on it. By doing this a new MatDeck script document will open. This document is dedicated to writing and processing MatDeck script code.

A new empty MatDeck script document will open.

Here we add the necessary script code to start our SCADA tag form.
Please Note: MatDeck script can be used in multiple ways including MatDeck script documents and in standard MD documents. For more information on where and how MatDeck script can be used check other manuals available.

Like the example used for starting SCADA applications via canvas functions, we will need to store our functions in variables.
The function doc_dir() is used to direct in which directory the file will be saved.
In this example, scada_form() ,the function used to start the SCADA tag form is stored in the variable ‘a’. scada_form() arguments are explained in the previous example. The function below, embed_widget(), is used to embed the SCADA tag form that will be in created into the MatDeck document. By default, SCADA tag forms created would appear as a new standalone window.
Starting SCADA applications via MatDeck programming blocks
In this segment about starting SCADA applications, we will look at how they can be started using MatDeck script in programmable blocks. This method may be preferred for those who wish to code in MatDeck script code but not have to use a MatDeck script document. This also may prove beneficial for some who look to use other MatDeck features such as math functions and canvases with the code written.
Start by adding a Text Code block to your MatDeck document. Do this by pressing on the Text Code icon present in the Programming tab of the MatDeck toolbar. Press on the area of the document you wish to code in.
The function doc_dir() is used to direct in which directory the file will be saved.

In this example, scada_form() ,the function used to start the SCADA tag form is stored in the variable ‘a’. scada_form() arguments are explained in the previous example. The function below, embed_widget(), is used to embed the SCADA tag form that will be in created into the MatDeck document. By default, SCADA tag forms created would appear as a new standalone window.
Configuring SCADA tag forms in MatDeck
Depending on whether the tag form you are using, the tag form will either be a standalone window or integrated in the MatDeck document. Either way, the initial tag form that you have initiated will be empty and have two options such as the one below.
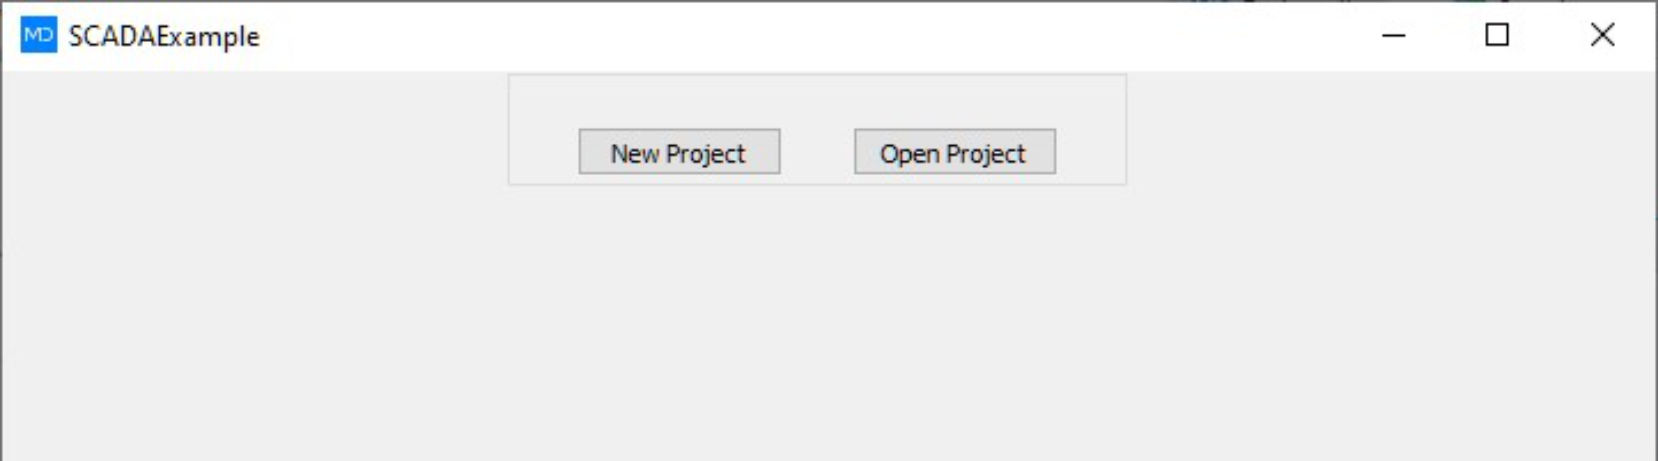
The two options present are ‘New Project’ and ‘Open Project’.
New Project
‘New Project’ is used when a new database is going to be used for the SCADA application. In short, when the 3rd argument of scada_form() (the database used) is left empty (“”), ‘New Project’ needs to be used so a new database for the SCADA application can be established.
When pressed a new file manager directory window will open. Here, direct the manager to where in your file directory you wish to save the database you wish to use for your SCADA tag form. It’s suggested that you save your database file in the same directory as your MatDeck document. If you prefer to save your file in another directory, more code will need to be used when retrieving data from your file.

As you are using a new file that didn’t previously exist you will need to save the new file you wish to use. It is recommended that you save your file in the same directory as the MatDeck document. Once finished, the configuration of the SCADA’s tag form is completed.
Open Project
Pressing the ‘Open Project’ option will use a database file that already exists. The same file directory window as above will open when you have selected the option. However, the new window will request you to select the file you wish to use. Once you have double clicked on the database file you wish to use, the configuration of the SCADA’s tag from is completed.
Using configured SCADA tag forms
Once you have configured a SCADA tag form in your MatDeck document via ‘New Project’ or ‘Open Project’ we can begin to fill in the necessary data fields of the SCADA’s tag form. A new empty SCADA tag form will open when you have configured the form.

Above is an example of the new tab that will open in your MatDeck document.
Configuring Devices in MatDeck documents
The first steps in starting SCADA applications in MatDeck are device and channel configuration. To configure a connected hardware device in MatDeck a configuration form needs to be used. The configuration form is used to define all necessary parameters and tags of the device.
There are three main ways a device configuration form in MatDeck can be initiated.
- Device configuration via the form selector
- Device configuration via canvas
- Embedded device configuration via canvas
Device configuration via the form selector
A form selector is a dedicated tool in MatDeck used to initiate selected function. The form selector can be used to initiate the SCADA device configuration form as well as other forms available in MatDeck. To use the form selector first insert a canvas where the form will be placed into the MatDeck document. Once inserted, go to the ‘Insert’ tab and set the form selector’s settings to those of your device.

The first drop down menu of the form selector is used to select the manufacturer of the device. As most devices have different inputs and outputs depending on the manufacturer, each manufacturer will have a set of functions dedicated to their product. Once the manufacturer has been selected, their functions will be the only options present in the second menu.

The second drop down menu will allow you to select a configuration form that can be used on the device. Select the function that is under the device’s name. Once both drop down menus have been selected, press on the ‘Form’ icon left of it. Now to deploy the form you have selected simply press on the area of the canvas you wish to use. Your function will outputted there along with the complimentary embed function which is used to embed your form into the document.

embed_widget() is the function used to embed the created form into the document. It has only one argument, the widget or variable which is to be embedded.
Below is an example of SCADA configuration form embedded in the MD document. Most prefer to use it as a standalone window.

Device configuration via canvas
Another way of initiating a configuration for your device(s) is through writing configuration forms in canvases. This way of initiating a configuration may be preferred by users who are confident with the details of their device(s) and the configuration functions. Like the example before, we need to first insert a canvas into the document. Once inserted we can begin to write our configuration functions.

The image above is an example of this. When using configuration functions make sure to store them in suitable variables so that they can be used further on. In the example above we store the function in the variable “Form”. The function itself is configForm(). Its only argument is the string name.
Please Note: the function used to initiate the configuration form will also have the name of the manufacturer at the start of the function. In the example, we don’t have a manufacturer but an example would be like “Manufacturer” configForm().

By default the configuration form will not appear if it is not initiated. For now, the form is stored in the variable. In this example, we will display the form by using the function, show(). Its only argument is the name of the function or variable being used. show() will display the form as a standalone window independent of the document. The image above is an example of this. When the document is evaluated the form will appear.
Embedded Device configuration via canvas
This method uses the same features and configuration functions as the method before but produces a embedded form present in the document instead of a independent window. Each step follows the same method as the previous one but instead of the show() function, the embed_widget() function is used instead. Like the show() function its only argument is the name of the widget or variable which is to be embedded.

The example above uses the same variable name and configuration function as non embedded method of initiating a device configuration form.

Custom MatDeck SCADA Functions
MatDeck SCADA applications also come equipped with custom programming functions that can be used to interact and program certain aspects of the SCADA application. The functions can be used to manipulate the following aspects:
- SCADA Tags (Tag values, Tag names…)
- Instrument/objects present in SCADA panels
- Mathematical functions and other MatDeck features can also be used
Below we will discuss multiple different functions that can be used in SCADA applications and dissect a example code. Programming is important for SCADA applications as it makes applications more accessible and can be used for complex tasks.
Please Note: MatDeck script programming notices and sees SCADA tags and variables present in the SCADA panel. Variables and values do not need to be exported between the SCADA form and the MatDeck document. MatDeck programming automatically recognises SCADA tags and variables and can be used directly in the code.
Functions that manipulate SCADA Tags
scada_tag_value()

This function is used to retrieve the value of a selected tag in the SCADA application. In the example above, the SCADA tag is used for a switch which is present in the SCADA panel. Consequently, the SCADA tag is named “Switch1”.
The function has two arguments, the name of SCADA configuration form used or the variable it is stored in and the name of the SCADA tag respectively. In this example, the SCADA configuration form is stored in the variable, “scada”.
scada_tag_write_value()

This function is used to write in a certain value into a selected SCADA tag. It has three arguments. The first, the name of the SCADA configuration form used or the variable it is stored in. The second, the name of the SCADA tag we are writing the value to. Lastly, the third parameter is the value we are going to write in.
In the example used, the value we are writing in is the name of a variable within the code.
scada_tag_event_value()

An event is classified as when a certain tag or object in the SCADA panel begins a process. This may be a switch being turned on and outputting on or a port receiving a input. In short, when something happens to a tag or SCADA panel object “their” event is initiated.
The function above has 3 arguments and the function checks if the selected tag or SCADA instrument event has been initiated. It outputs a boolean depending on whether the tag’s event is initiated.
- True – has met the criteria for the event to begin
- False – has not met the criteria for the event to begin
For example, if the event mininmum is set to 10, and the tag’s value exceeds 10, then its event begins.
The 3 arguemetns for the function is:
- 1st – name of the SCADA form used or the variable in which it is stored
- 2nd – tag which is being checked
- 3rd – condition or min/max value required for ‘their’ event to be initaited
Functions used for the SCADA itself
The functions in this segment are used to interect with the general SCADA form or panel itself. This indcludes functions that check if the SCADA is working, start the SCADA application or end the application.
scada_form()

This functions has already been mentioned at the start of the manaul for further refrence. This funcions can be used to open a new SCADA configuration form instead of inserting via a toolbox.

The window above is a example of the SCADA configuration form that the function will open. From here you can configure your SCADA panel further.
The function has 3 arguments, the parent widget, string name that will be used for the SCADA panel, and the database used. If the last argument is left “”, a new database file will be created in the same folder as the SCADA panel.
scada_start()

When programming code regarding a SCADA application, that application needs to be started/initiated within the code so that MatDeck can recongise tags, variables and other features from the SCADA application.
This function only has one argument, the string name of the SCADA form or the name of the variable it is stored in.
The function is normaly used at the start of the code, so that all code further down can be used with SCADA features.
scada_stop()

Similar to scada_start(), scada_stop() is used to close and stop the SCADA application from running any further. It only has one argument, the string name of the SCADA form used or the name of the variable it is stored in. In this example, the variable it is stored in is used.
This is normally used at the end of the code to stop the application running aimlessly.
scada_is_working()

SCADA applications may include many tags and the device may also have many parts. This tends to mean that SCADA application are processing heavy and may require a certain amount of time to start. If the application takes considerably long, it is advisable to restart the application as it may load quicker.
This function is used to check whether a selected SCADA application is working. It only has one argument, the string name of the SCADA form or the name of the variable in which the SCADA form is stored in. It produces a boolean value.
- True – SCADA is working
- False – SCADA is not working
In the example used above, the IF function is used to check whether the SCADA application is working. If the SCADA applicatoin is not working, the if clause will be triggered.